OT: Putting in a brick patio

northstarvintage

Administrator
Staff member
My husband and I have been waiting for a friend (who is a mason professionally) to do this for us, but it seems like between the bad weather here in Maine, and his busy schedule, he's not going to get to it.

It's a relatively small area - a 10' x 12' rectangle with a walkway so we're starting to think of taking this on ourselves, hiring a couple of friends who have already done this type of work. So we'll have the muscle.

Or should we just bite the bullet and hire a pro? We already have the bricks, but will need sand and gravel, and....I don't know what else!

Are there any books or websites that are especially helpful? I know Linda/Vintageclothesline is doing a similar project - she is my hero!

Thanks

Susan
 
Susan - I hope they aren't clay bricks because the Eastern winters of dampness, freezing and thawing will crack and spald the surfaces - you have to use concrete pavers in our climate because bricks wont' survive more than a few winters.
 
Hi Susan, last year I put in 2 of those big circle patios with the help of a bunch of friends who aren't answering my calls this year!:BAGUSE:
This year I am working on a natural stone walkway. (I doubt I will get it done soon because of all the freaking RAIN--grr)

They aren't hard to do--just back breaking.
The key is to make sure you start with a level base--if you are level, the rest is cake. I filled mine in with sand and just kept sweeping the sand into the crevices and it turned out fine.
I guess it depends on how large of an area you are doing.
The larger, the harder--because it is hard to make sure a huge area is perfectly level. I would hire a professional to do a larger area.

The 2 circle ones I did, can fit 3 of the larger size Adirondack chairs and a table. I can't remember how many feet--I think they were supposed to be a 10 foot circle but turned out to be 12" and we had more stone left over so I made little circles next to them for planters and a fire thingy in the back.

I have a pic of the work in progress from last year on the one I added to the front of the house...

front4.jpg


I just went outside to photograph it now and (I cant believe I am going to show these!!) My yard usually isnt this messy but with all the rain I havent had a chance to clean up & weed--...Anyhow, the front circle patio
front.jpg


The back circle

front1.jpg


And this is the natural rock walkway I am working on this year...I am trying to fill in the gaps with smaller rocks.

front2.jpg


front3.jpg


When I went out to phot these to show you I also came across the babies :)--they are so cute!

front5.jpg
 
Tiffany your yard and critters look like a slice of heaven!! and i love your idea to put smaller stones between the pavers, that's great!

good luck, Susan! want pix, Linda!! (please)
 
Susan,

My husband (not a professional, but handy) did three patio areas in our backyard and curving paths connecting them all. One of our patios is the same round one as Tiffany's, but set within a rectangle of other pavers.

Jonathan is absolutely correct, though, about the concrete paving stones and my husband insisted on them.

My husband rented a wet saw to cut the concrete pavers for the curving sidewalk, but for a plain rectangle you may not need that, unless you have awkward spaces that can't accommodate the full brick. He advises first making a wood frame of the largest thickness of treated lumber (or something that can sit in the ground) you can get. He also suggested casually laying the outside pavers around the perimeter before you permanently place the frame, so you can get a number of whole pavers along the sides (and not have to cut any). In other words, be sure the sides will accommodate something like...oh...say...50 whole pavers, rather than 49 and three quarters. Once you know the dimensions that will give you whole pavers you can then place the wood frame.

He thinks he excavated a 6" base first (then the pavers go on top of the 6" base, so the height of the paver has to be accounted for, too). If you make the wood frame level, you can use the frame to level the sand before you place the stones. I think the thing he made to do that is called a screed. Essentially it is a longer piece of straight lumber that reached from side to side of the wood frame and in the middle bottom of it was attached a shorter piece of lumber that basically dragged along the sand bottom (to level the sand) while the sides of the upper piece of wood dragged along the frame. (Did I describe that clearly?). As you lay the pavers you have to periodically use the screed to adjust the level before you lay more. When the sand was level on the bottom he just placed the pavers on top. We, too, put sand between the pavers, so rain water would percolate through them, then tamped it all with a tamper--a heavy metal square attached to a wood pole.

Although I know he would roll his eyes at this, I thought it was a surprisingly fast and easy job for one person who had never done this before.
 
First of all, I am not through but I will be SO happy when I am. I am still laying pavers and after that have to fill in with sand and then outline patio with river rock.

There are many good websites for information. I will try to post some here but just google in meantime.

They tell you to first use a 3/4 grade limestone about 3 to 4 inches, then a 2% paver) sand (drains good) of at least 2 inches and then the width of your paver/brick. To have this even with the ground, you have to dig down a total of this.

First of all, I wish I had just used something like pea gravel or no gravel at all. However, that 3/4 roadpack will set up quite well. Next, if you are laying these by yourself like I am, DON'T use a 16" square paver..too big and so heavy. Also I thought I could just work from the sidewalk but the sidewalk is not square with the house so that is why it is at an angle. They tell you to slope away from your house. Well, I have a lot of slopes..lol..and I think it will drain just fine with the gaps between the stones and the river rock on the outside.

Very important...I don't think a paver patio can ever be level. I have really tried but I think this is impossible. I am going for the vintage look..:D You can try to drag your sand with a 2 x 4 but the best thing to do is just to have a bucket of sand and level each paver as you go. That is what I have been doing on the last part of it so that will be a lot more level than the first part.

At this point, I don't care! Just want to finish and put my furniture on it and start enjoying.

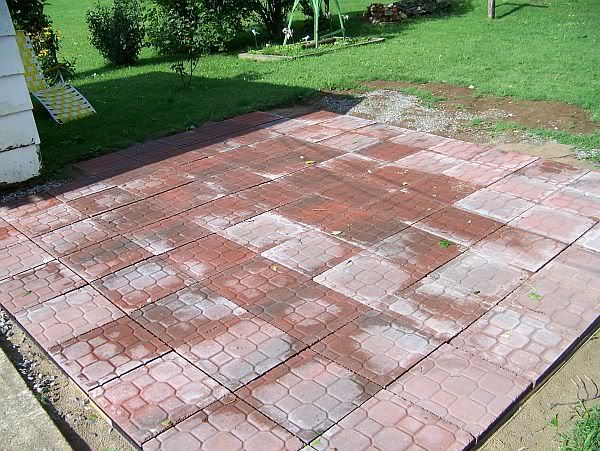
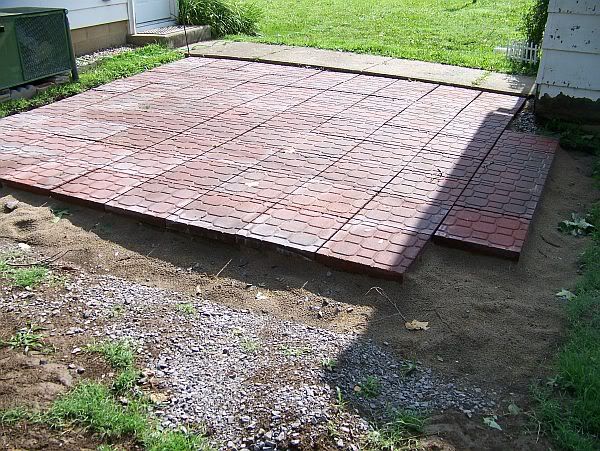
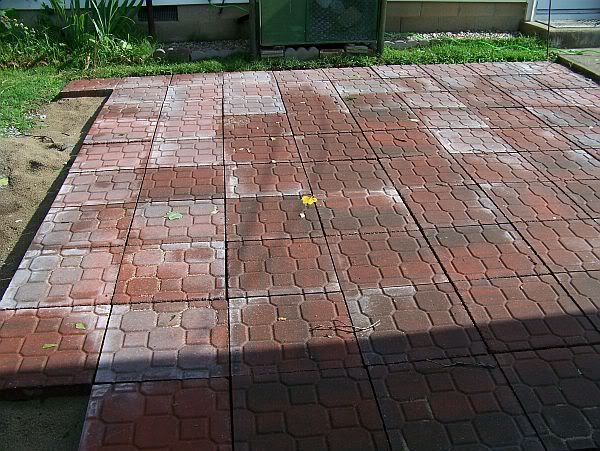
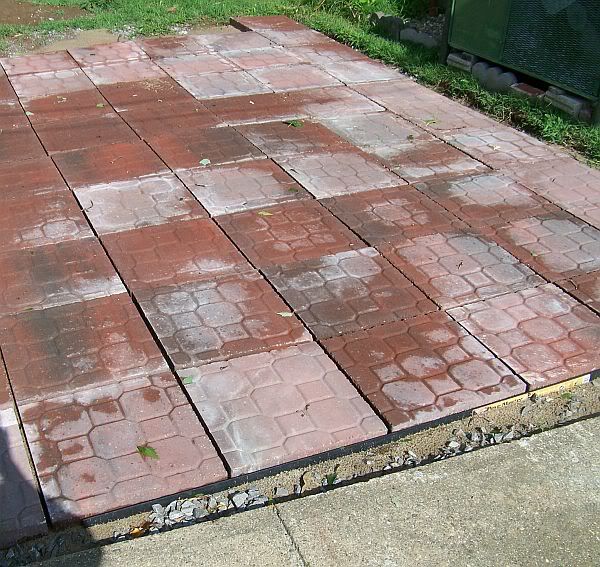
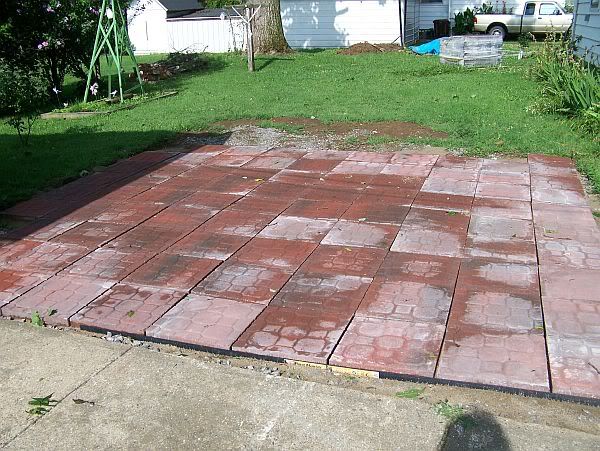
Days of work preparing. First we had to slice off the top layer of lawn. I recommend renting a sod cutter machine to do this. We did it all manually. Then we took her tiller and tilled up the soil to make it loose. Finally, someone with a tractor said they would help so they removed the dirt to a pile to later use for gardens or something else. Only problem here is they didn't go down low enough so we just had to wing it. Tractor also brought in the layer of rock. We wheel barrowed the sand in by hand.

For a 15 x 15 (which it is not that big now) took about 1.5 tons of sand and about 2.5 of gravel. Cost about 125.00. Delivery was the most cost but didn't want to truck it in myself.

Anyway, still more work to do. Be prepared to take lots of pain reliever and have the muscle rub handy. Will post pics of final product later.

patio2009006.jpg


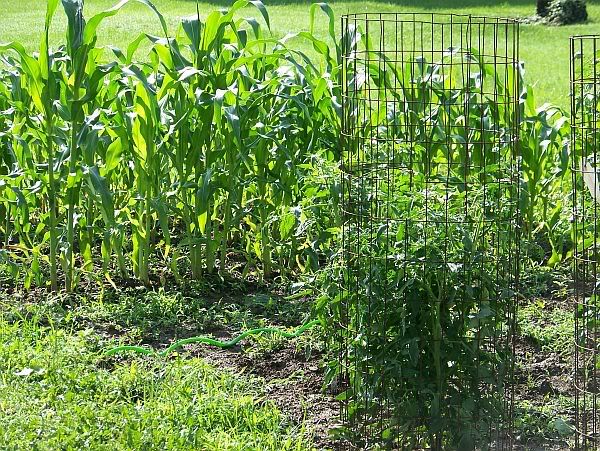
BTW, this is my garden with tomatoes and corn. Need to weed but have been too busy with patio. We had a storm yesterday and it knocked down all my baskets. I was out knee deep in mud getting them back up.

patio2009005.jpg


patio2009004.jpg


patio2009003.jpg


patio2009002.jpg


patio2009001.jpg
 
DH and I have laid down 2 brick patios. One with old thick bricks, one with concrete pavers.

When planning it out, if at all possible get your dimensionr where you won't need to cut a lot of pavers. It will make it much easier and you won't have to rent a wet saw.

We excavated and tamped the soil. The Monty did an edging with the bricks/pavers laid as soldiers. Then we laid in gravel and tamped that down and gave it a light screeding. Then we laid in sand, tamped it down, screeded it, then sprinkled it, added as needed, rescreeded. Then laid pavers while kneeling on a sheet of plywood. Then filled the cracks with sand by sweeping it over the surface. Then sprinkled again.

There are sites online that will help you with the amounts of gravel and sand. Though we have found they often err on the too much side.

Get knee pads!!!

Hollis
 
Hi everyone

Thank you so much for all the advice and I LOVE seeing the photos of back yards - they look great - little heavens.

That's a great point about the brick, except that we already have the bricks here! Our mason friend dropped them off last year, after tearing up another brick patio. They're in great shape, so I'm hoping they are super strong New England bricks (?)

It gives me inspiration that so many people here have done this - though I am not looking forward to the digging, tamping, lugging, and consequent aches and pains. Ahhh...the joy of home ownership!

Thanks again

Susan
 
Back
Top